Use Safyr to create an inventory of Personal Data for GDPR from Salesforce
This post explains how you can use Safyr® to start to build an inventory of personal data for GDPR from a Salesforce system and then to share that information; in this case in an Excel spreadsheet. The process would be similar for SAP, Oracle or Microsoft packages.
Background: One of the early tasks on the road to compliance with the GDPR is to identify where Personal Data items are located across an organisations’ data sources. These can be manual or IT systems. The results are likely to be documented in some form of central storage area. This could be as simple as a spreadsheet, in house designed database or purchased in the form of a Data Catalogue or Governance platform.
As well as enabling data audit this will help to identify where action may be needed to enable Data Subjects Rights.
Whilst many IT systems give up their personal data relatively easily through scanners or manual discovery, finding Personal Data in ERP and CRM systems presents a particular challenge. This can be due to size or level of customisation of the data model, opaque naming conventions and inaccessibility of metadata or any combination of these. You can read about some background research into the size and complexity of enterprise application data models here.
GDPR Discovery Process
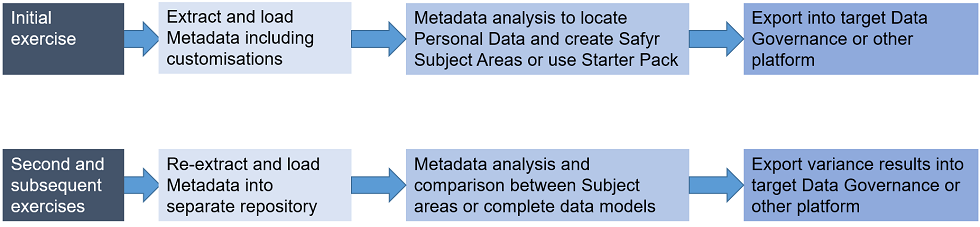
It is also important to remember that you will need to repeat this exercise at intervals in order to ensure that relevant changes are captured in the inventory.
Step 1: We recommend building a list of potential personal data candidate attributes. The make-up of this list will be determined by the nature of your business activities and the data subjects with whom you interact.
For SAP, JD Edwards and Siebel, Silwood delivers a set of pre-configured Safyr personal data subject areas.
A non-exhaustive list of personal data attributes items you might consider as candidates could be:
| Bank Accounts | Gender | Mobile Phone | Social Security |
| Birth Fields | HR Personal | Personnel Number | Telephone |
| Citizenship | Illness/Sickness | Political Affiliations | Unions |
| Credit/Payment Cards | Internet | Postal Address | Veteran Status |
| Drivers License | License Plate | Racial/Ethic Origin | ZIP and Post Codes |
| Marital Status | Religion |
Personal data attributes items (non-exhaustive list)
Step 2: Use Safyr to connect to Salesforce, extract its metadata and automatically populate a Safyr repository.
The information retrieved will include tables and attribute names, descriptions, table relationships, a row count for each table and more.
To ensure that you are working with accurate metadata the Safyr extracts and stores any customisations to the data model in the repository.
For Salesforce this process takes a few minutes. Larger systems take longer; up to 3 hours for a full SAP system of over 90,000 tables.
You will then be able to see how many tables the system contains and start the exploration process.
The Salesforce system shown here has 330 tables including custom objects added to the base system. For each table you can also see the number of related tables and the table row count.
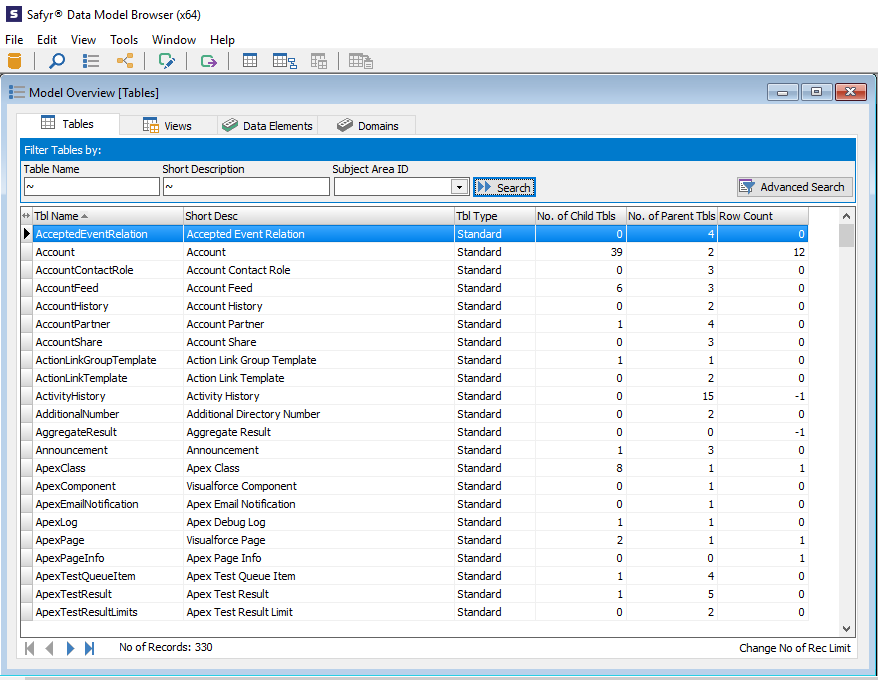
Salesforce with tables, custom objects, related tables and table row count
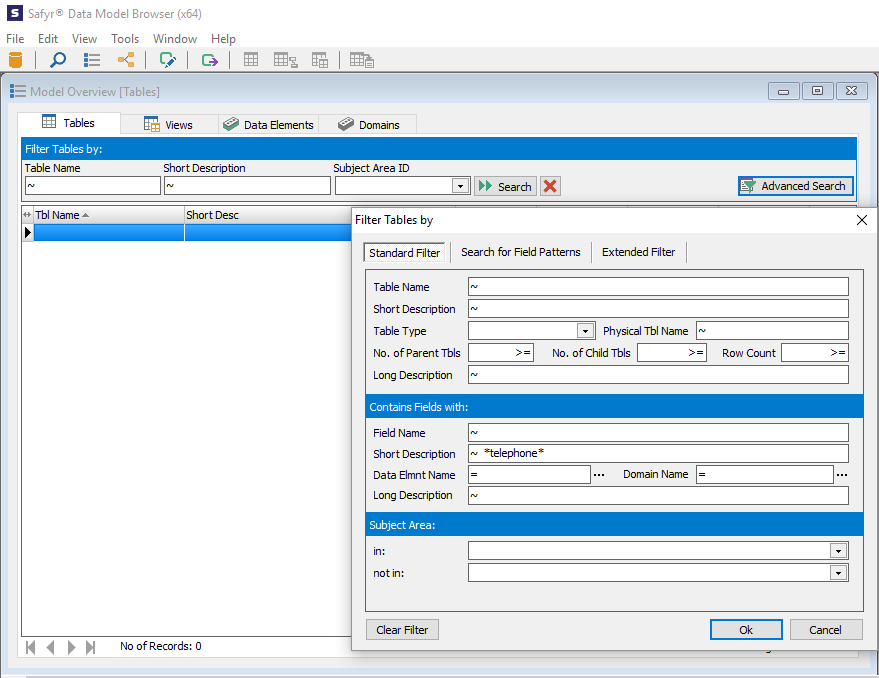
Step 3: Safyr has an Advanced Search feature which allows you to search for, amongst other things, specific text strings found in the Short Description Safyr finds for each attribute.
For example, you could also search for specific table names or descriptions. This search is across all tables.
In the next screenshot, we have searched for the string “telephone” in this Salesforce system.
This has returned zero results.
Therefore, as it is highly likely that some form of telephone numbers is stored in the system, it is necessary to refine, or retry the search.
Safyr Advanced Search Feature – search for specific text strings in Salesforce
Step 4: In the example we have changed the string search to be “phone”.
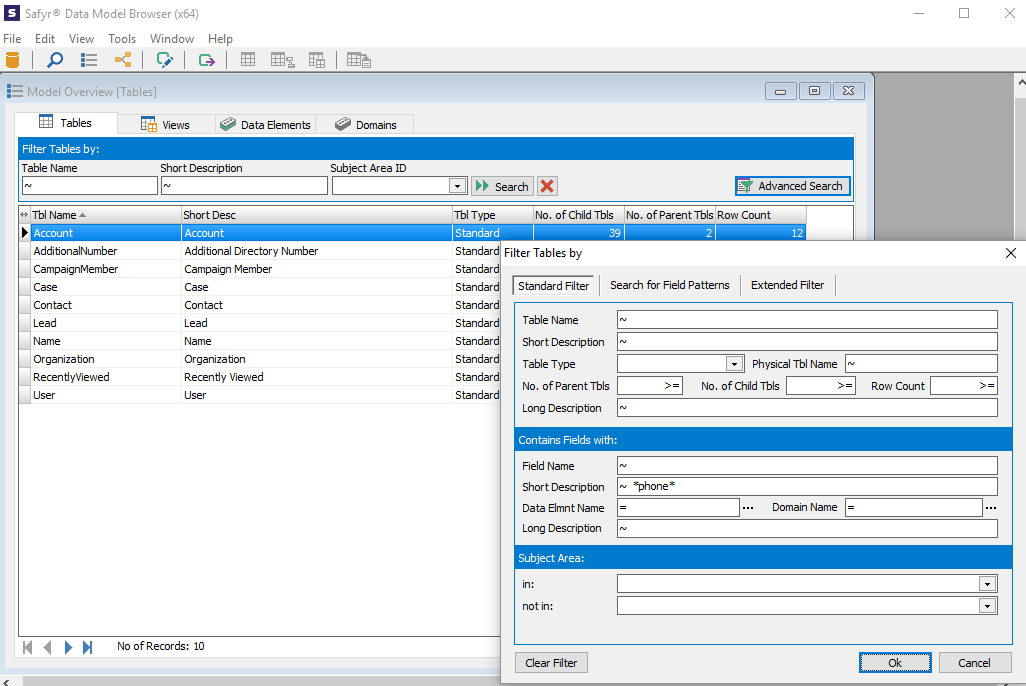
Safyr Advanced Search Feature – changing the string search
We can now see that there are 10 tables in this Salesforce org which contain fields with the string “phone”.
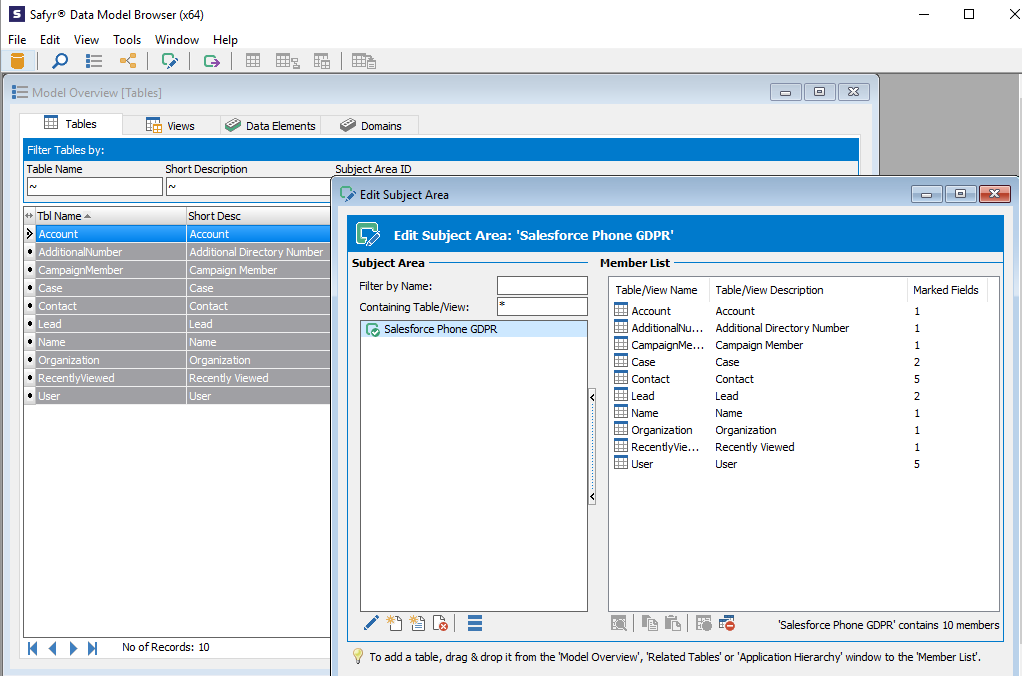
Step 5: The next step is to add those tables to what we call a Subject Area in Safyr. A Subject Area can be a group of any number of tables.
They can be used as a basis for further analysis, exporting to a range or third party products and formats or combined with other Subject Areas to form an amalgamated Subject Area.
The Subject Areas can also be used to compare differences between any 2 instances of the same source application
We can create a Subject Area to hold these 10 tables very quickly and easily.
All it requires is for all the tables in the results set to be selected and then added to a new Subject Area including the Marked Fields.
Marked Fields are those which contain the string “phone”.
In the example above we have created a Subject Area called “Salesforce Phone GDPR”.
The Marked Fields column indicates number of times the string “Phone” occurs in each table.
Adding a Subject Area in Safyr
Step 5: The next part of the process could be to go through this process for other Personal Data candidates and perhaps combine them into a larger more comprehensive Subject Area inventory of Personal Data items.
That information can then be shared with other Data Catalogue or Governance platforms, Data Modelling tools or in other formats.
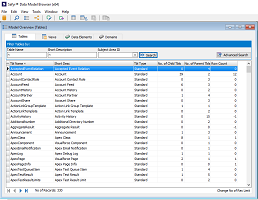
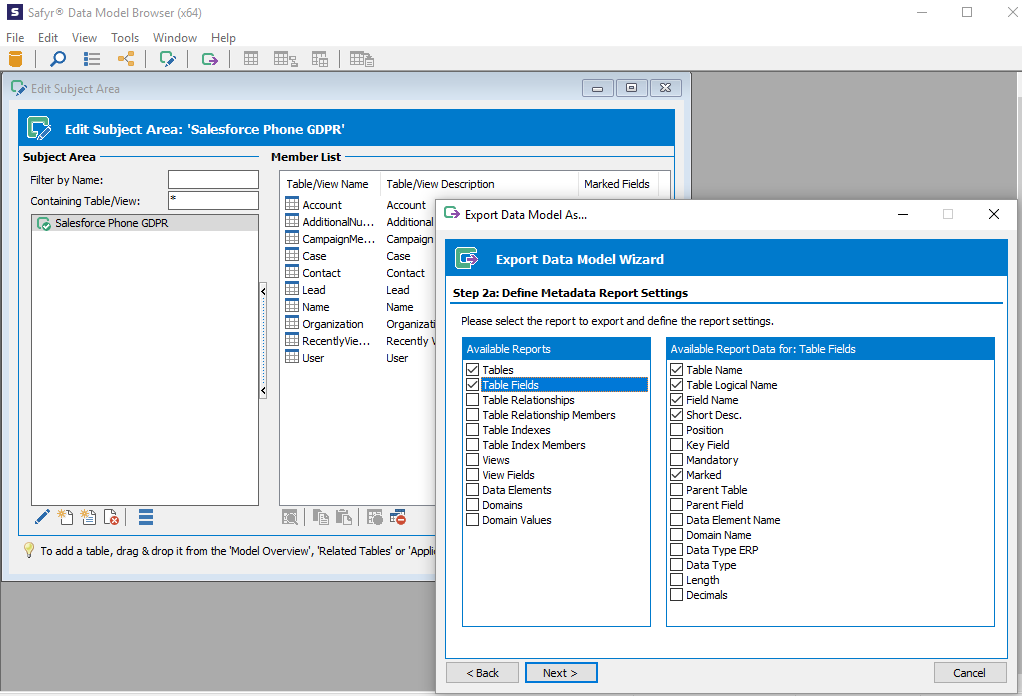
Many companies are using Excel as the basis of their Personal Data inventory so to demonstrate how we can support this, we are going to use Safyr to create and populate an Excel spreadsheet with the Personal Data items from the Salesforce GDPR Phone Subject Area.
Select the Hamburger Menu icon in the Subject Area window and follow the Export wizard which will allow you to select the Safyr Metadata Reporting option. Then you can decide which individual items of metadata you want to include.
Using Safyr to create and populate an Excel spreadsheet with the Personal Data items from the Salesforce GDPR Phone Subject Area
Step 6: These are the results of the Subject Area having been exported to Excel. We have filtered the Marked Field column to only show those fields which contain the string “Phone”.
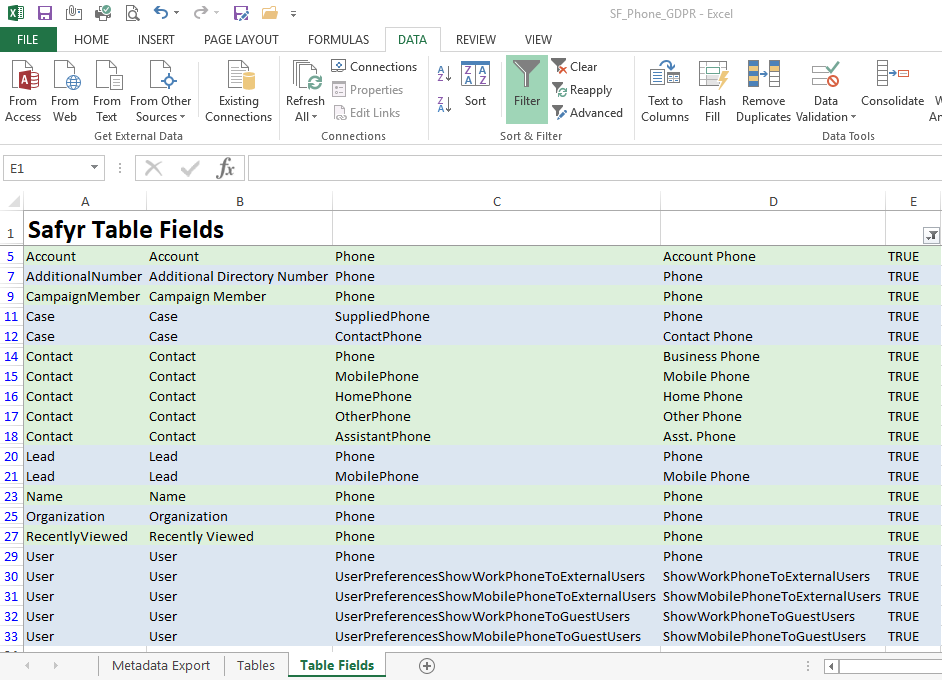
Results of the Subject Area having been exported to Excel
Summary
Using Safyr to complete this process for this Personal Data item only took a few minutes. Inspecting the system for other candidates will take a similar amount of time. As a result Safyr offers a faster and more accurate approach to creating an inventory of Personal Data from your ERP and CRM applications.
You can use Safyr to adopt a methodical approach to finding Personal Data items in those large complex systems whose metadata is difficult to access and not easy to understand. In addition because it works with your systems as implemented you know that you are working with accurate metadata.
Finally, when you need to check whether the Personal Data in the source application is unchanged following development or customisation work or the implementation of a new version you can use Safyr’s Compare facility to identify and highlight differences.
If you would like to try Safyr® for yourself, you can start your free 10 day trial here.


Leave a Reply
Want to join the discussion?Feel free to contribute!